
English
English


Views: 0 Author: Site Editor Publish Time: 2026-08-24 Origin: Site


Parents and educators often face a difficult decision when selecting robotics hardware for novices. More build configurations and higher part counts do not automatically equal a better learning experience. Buyers struggle to balance a child's current fine motor skills and attention span against the desire for long-term replay value. This mismatch frequently results in abandoned projects, lost components, and frustrated learners who walk away from engineering concepts entirely.
To make an evidence-based decision, buyers must evaluate a 3-in-1 vs 12-in-1 STEM robot kit through the lenses of mechanical complexity, power source reliability, and realistic educational outcomes. Understanding the physical demands of assembly and the environmental requirements of the power source dictates the success of the build. By analyzing these factors, you can select a robotics platform that matches the learner's developmental stage and ensures a successful introduction to mechanical engineering.
Complexity vs. Completion: 3-in-1 kits prioritize immediate gratification and robust, playable builds, making them highly effective for younger beginners (ages 6–8) developing baseline motor skills.
Progressive Challenge: 12-in-1 kits offer extensive versatility and higher part counts (often 190+ interchangeable pieces), best suited for older beginners (ages 8–12) with established frustration tolerance.
Power Source Realities: The choice often dictates the power mechanism; 3-in-1 kits frequently use reliable battery/RC systems, while many 12-in-1 kits rely on solar panels that require specific environmental conditions to function.
Procurement Strategy: When purchasing a STEM robot kit for students at scale, evaluating the educational robot kit supplier for replacement part availability and clear return policies is as critical as the kit's initial feature set.
You must evaluate the physical demands of assembly before finalizing a purchase. A beginner STEM robot kit needs to align precisely with the user's manual dexterity. Younger learners thrive with large, rounded parts suited for tactile exploration. These components snap together easily and require minimal physical force. They often use magnetic connectors or thick plastic pegs that forgive clumsy handling.
Advanced kits feature micro-connectors, tiny pinion gears, and fragile plastic pins that demand high precision. You have to assess how the structural design impacts the physical assembly process for developing hands. Pushing a 2mm metal shaft into a tight plastic gear hub requires significant pinch strength. If a child lacks this strength, they will bend the shaft or warp the gear. The ergonomics of the pieces dictate whether the build feels like an engaging mechanical puzzle or an impossible chore.
There is a direct correlation between build time and beginner engagement. Every learner has a threshold where a lengthy assembly process transitions from educational to discouraging. For a novice, success is measured by how quickly they can see their creation move. If a build takes four hours, a younger student will likely abandon the project halfway through.
You should define this "time-to-play" metric carefully when evaluating options. Kits that yield a functioning robot in under 45 minutes maintain momentum and excitement. Longer builds require breaking the process into multi-day sessions. Watch for these common signs of build fatigue during longer assemblies:
Skipping steps in the instruction manual to rush to the final product.
Forcing mismatched parts together instead of verifying the diagram.
Leaving small components scattered outside the designated sorting tray.
Expressing visible frustration when a sub-assembly requires disassembly due to an earlier mistake.
Establish exactly what the beginner is actually learning during the assembly process. Some kits focus heavily on mechanical engineering principles. Users spend their time following spatial schematics, understanding gear ratios, and building basic physical circuitry. They learn how a worm gear changes the direction of force or how a crank-slider mechanism creates walking locomotion.
Other kits prioritize software, offering pre-assembled modules that connect directly to visual coding platforms. Determine if the learner would benefit more from hands-on mechanical assembly or if they are better suited for software exploration. A purely mechanical kit builds spatial reasoning and patience. A programmable kit introduces computational logic and algorithmic thinking. Align the kit's primary teaching mechanism with the specific educational goals you want to achieve.
Examine the standard configurations found in these streamlined kits. A typical 3-in-1 STEM robot kit often includes designs like a tracked vehicle, a mechanical robot, and a racing tank. These models share a core chassis and a unified motor block. The motors are usually pre-soldered and enclosed in a protective plastic housing, eliminating the need for delicate wire routing.
The structural integrity of these models is deliberately high. They are designed for active, post-build play rather than mere observation. Once assembled, the robot can bump into walls, traverse carpets, and withstand rough handling. The architecture prioritizes a solid, unified frame over intricate, delicate linkages. This ensures the final product survives the enthusiastic testing of a young engineer.
Fewer parts significantly reduce cognitive load and organizational fatigue. When a box contains only 50 distinct pieces, a beginner can easily inventory and sort them. This simplicity builds immediate confidence. The builder spends less time searching for a specific 3mm spacer and more time actually assembling the chassis.
High reliability is another major advantage. The battery-operated or remote-controlled motors found in these kits ensure immediate feedback. Interactive play begins the second the final piece clicks into place and the switch flips on. This immediate gratification reinforces the learning loop. The child learns that following instructions yields a fun, controllable machine, motivating them to tackle the alternate build configurations included in the manual.
Despite their durability, these kits possess a lower ceiling for progressive learning. The kit may be outgrown quickly once all three models are mastered. After building the tank, the robot, and the car, the educational novelty fades. The hardware often ends up sitting in a storage bin.
Furthermore, these kits offer limited exposure to alternative energy concepts. They rely almost exclusively on standard AA batteries or USB-rechargeable packs. You will rarely find solar panels, hydraulic pumps, or pneumatic cylinders in a standard three-model kit. If your goal is to teach renewable energy or complex mechanical linkages, this focused architecture will eventually fall short of your curriculum needs.
Common 3-in-1 Kit Configurations and Playability
Build Configuration | Primary Mechanical Focus | Playability Level |
|---|---|---|
Tracked Tank | Tread tension and dual-motor steering | High (Handles rough indoor terrain) |
Wheeled Rover | Axle alignment and speed gearing | High (Best for smooth floors) |
Standing Robot | Center of gravity and balance | Medium (Prone to tipping over) |
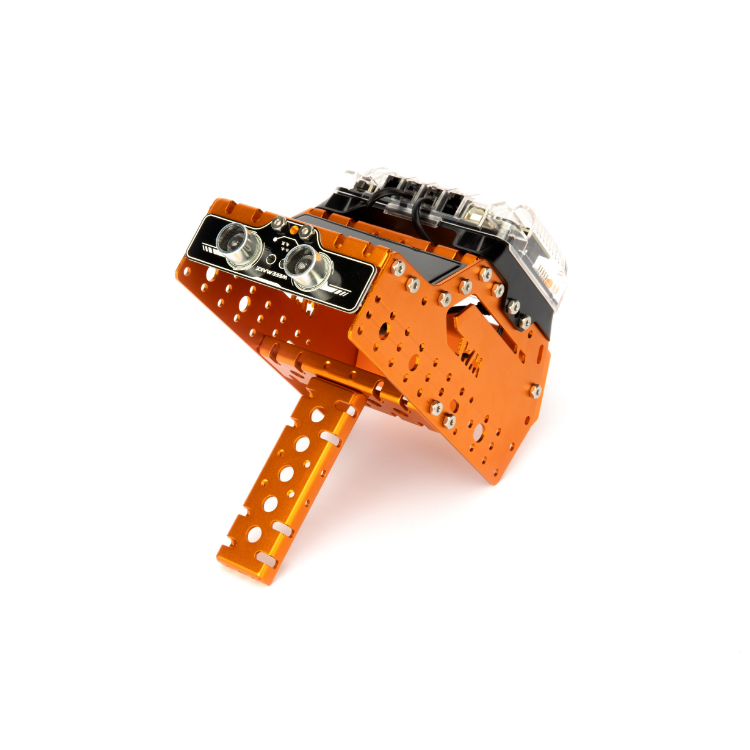
A standard 12-in-1 STEAM robot kit features a high-part-count system, typically exceeding 190 interchangeable pieces. The parts often arrive attached to plastic sprue trees, requiring flush cutters to remove them cleanly. The architecture relies on a central power module—often a solar gearbox—around which various limbs and wheels are constructed.
These kits provide an overview of tiered progressive difficulty levels. Level 1 includes basic builds like a rolling turtle or a simple boat. Level 2 advances to complex mechanical walkers, crawling crabs, and balancing zombies. The component density requires meticulous sorting. Builders must navigate numerous identical-looking gears, shafts, and connecting pins to successfully transition from one configuration to the next.
These extensive kits offer high replay value and an excellent cost-to-build ratio for hobbyists and students. A single purchase provides weeks of structured building activities. They also excel at the integration of broader science concepts, representing the "A" and "S" in STEAM. Users gain hands-on experience with solar energy conversion, learning how light translates into electrical current.
The varied mechanical locomotion teaches fundamental physics and kinematics. A crawling robot uses a completely different linkage system than a rolling rover. For an older beginner with the patience to follow complex diagrams, this versatility provides a deep, practical understanding of how different mechanical linkages produce distinct types of movement.
The massive part count introduces a high risk of build fatigue and component loss. The most prominent limitation is the "It Doesn't Work" scenario. These kits have a high susceptibility to cumulative assembly errors. A slight gearbox friction or a misaligned pinion gear results in a completed model failing to operate, causing severe user frustration.
Additionally, the models are often structurally fragile. Because the pieces must be easily disassembled to build the next robot, the connections are not permanent. These robots are intended for observation and gentle testing rather than rigorous, destructive play on the living room floor. Common assembly errors that cause failure include:
Leaving plastic burrs on gears after cutting them from the sprue.
Pressing gears too tightly against the plastic housing, creating friction.
Reversing the polarity of the motor wires during the initial gearbox build.
Using the wrong length of metal shaft, causing gears to slip out of alignment.
Comparison of 3-in-1 and 12-in-1 Kit Features
Evaluation Metric | 3-in-1 Kits | 12-in-1 Kits |
|---|---|---|
Average Part Count | Under 70 pieces | 190+ pieces |
Estimated Build Time | 30 to 60 minutes | 1 to 3 hours per model |
Primary Power Source | Battery / RC | Solar / Halogen Light |
Structural Durability | High (Active play) | Low (Observation only) |
Target Age Range | 6 to 8 years | 8 to 12 years |
Compare the instruction manual clarity required for each option. A three-model kit usually features large, full-color diagrams with a 1:1 scale for hardware. You can lay a screw directly on the page to verify its length. A twelve-model kit condenses its instructions, requiring the user to interpret dense, multi-step isometric schematics.
Evaluate the margin of error carefully. How easily can a beginner backtrack if a gear is placed incorrectly? In simpler kits, fixing an error takes minutes. In complex kits, accessing a buried gearbox might require complete disassembly of the robot's core. Recognize the value of consulting open-build reviews or unboxing videos prior to purchase to gauge actual assembly complexity and manual clarity.
Address the most common failure point in high-capacity kits: the solar panel. Solar panels require direct, intense sunlight or high-wattage halogen bulbs to function. They will fail to operate under standard indoor LED kitchen lighting or on cloudy days. This environmental dependency often leads users to falsely believe the motor is broken.
Contrast this with the predictable, albeit consumable, nature of battery-powered systems. Batteries provide consistent torque regardless of the weather or room lighting. If your primary building environment is an indoor classroom or a dimly lit living room, a solar-dependent kit will create unnecessary operational barriers. You will spend more time chasing sunlight than actually testing the robot.
Assess which kit better prepares a student for advanced robotics. A simpler, sturdy kit builds immediate confidence and introduces basic circuit completion. However, a multi-model kit teaches advanced mechanical engineering, gear reduction, and alternative energy.
Evaluate the transition from guided building to open-ended, custom engineering. High-part-count kits leave users with a vast inventory of gears and linkages, encouraging them to design their own mechanisms once the manual is exhausted. Simpler kits limit this scalability due to their specialized, molded chassis parts. Choose the option that aligns with the learner's long-term trajectory toward visual coding or Arduino-based systems.
The critical importance of testing the bare motor and solar panel before assembling the complex gearboxes cannot be overstated. Teach learners to connect the wires and expose the panel to sunlight immediately after opening the box. You can also test the bare motor with a standard AA battery.
If the motor spins, you have ruled out factory defects. If the completed robot later fails to move, you instantly know the issue is mechanical friction, not a dead motor. This simple pre-assembly test saves hours of frustrating troubleshooting and prevents the unnecessary return of perfectly functional hardware.
Implement strict strategies for component management. This is especially critical for expansive kits where a single lost gear renders future builds impossible. Provide builders with tackle boxes, magnetic trays, or compartmentalized plastic containers.
Before the build begins, require the student to inventory and sort the pieces by shape and size. Never open plastic component bags directly over a carpeted floor. Establishing these organizational habits early prevents lost parts and teaches the meticulous workspace management required in real-world engineering and electronics assembly.
Knowing how to identify binding gears, excessive friction, or faulty motor connections is essential when a completed robot fails to move. Check for plastic burrs left over from the manufacturing sprue; these tiny imperfections can lock up a delicate gearbox. Ensure that shafts are not pressed too tightly against the chassis walls.
Set realistic expectations with learners about the debugging process. Frame troubleshooting as a core part of engineering rather than a failure. Teaching a child to patiently isolate a mechanical fault builds resilience and analytical thinking that far outlasts the initial build.
Establish strict criteria for schools, educators, and bulk buyers. When evaluating an educational robot kit supplier, look beyond the initial feature list. Scrutinize warranty terms, the availability of individual replacement parts, and curriculum alignment.
Purchasing a STEM robot kit for students requires a different vendor evaluation than buying a single retail toy. Classrooms experience high attrition rates for small components. Ensure the vendor offers clear return policies for defective units and sells replacement gear packs. A supplier that supports the product lifecycle is vital for maintaining a sustainable robotics program.
Audit the learner's current fine motor skills and attention span before selecting a kit complexity level.
Determine your budget for potential replacement parts if buying for a classroom environment.
Select a kit with a power source that strictly matches your primary usage environment.
Implement a pre-assembly motor test protocol to rule out electrical defects before building.
Organize a dedicated, well-lit workspace with sorting trays to prevent component loss.
A: These kits are generally best suited for children aged 8 to 12. The assembly requires advanced fine motor skills to handle tiny gears and pins. The dense instruction manuals demand higher reading comprehension and spatial reasoning ability. Younger children can participate, but they require heavy, continuous adult supervision to prevent frustration and assembly errors.
A: Typically, no. Standard indoor LED or fluorescent lighting does not generate the necessary energy spectrum or intensity to activate the solar panels. To operate these robots indoors, you must use a high-wattage halogen bulb placed very close to the panel. Otherwise, they require direct, unshaded outdoor sunlight.
A: The most common culprit is mechanical friction, not a broken motor. If you did not trim the plastic burrs completely off the gears, they will bind inside the gearbox. Additionally, pressing gears too tightly against the plastic housing creates resistance that the low-torque solar motor cannot overcome. Disassemble the gearbox and check for smooth rotation.
A: For classrooms, simpler battery-powered kits are vastly superior. They guarantee operation regardless of classroom lighting conditions. Kits with fewer, larger parts reduce the risk of lost components during chaotic class periods. Always prioritize kits that allow students to complete a build and test it within a standard 45-minute class block.
A: It depends on their prior experience. If the 10-year-old has extensive experience with advanced building systems, a three-model kit might lack sufficient challenge and be completed too quickly. However, if they are completely new to mechanical assembly, it serves as an excellent, frustration-free introduction to basic robotics.
A: Losing a critical component, such as a specific pinion gear or a unique drive shaft, will often render certain models impossible to build. This is why workspace organization is vital. When purchasing, check if the manufacturer sells replacement hardware packs, as this greatly extends the lifespan of the kit.


